Missing a Survey?

Is there a survey on this site that you think we need to add? Email me at paddedtushstats@gmail.com or post a comment anywhere on this blog and I will set up a survey for that diaper ASAP

Monday, May 30, 2011

Flat Fold Invention Submission: For Grandma Fold

Here is another submission for the Flat Fold Invention Competition from  Jan at My Moderate Family.

“As you all know I am participating in the flats and handwashing challenge, I have vowed to use only flat diapers and wash them all by hand for 1 week. The problem is my mother did not vow to use flats and was done her time with handwashing basic diapers almost 30 yrs ago.
I usually give my mother, mother in law, or any other babysitter pocket diapers or all in ones to use, but this week that is bit an option so I once again had to get creative. So I took all the covers I had to use which involved blow drying a couple that where hanging up and pre stuffed them making flat fold all in twos.

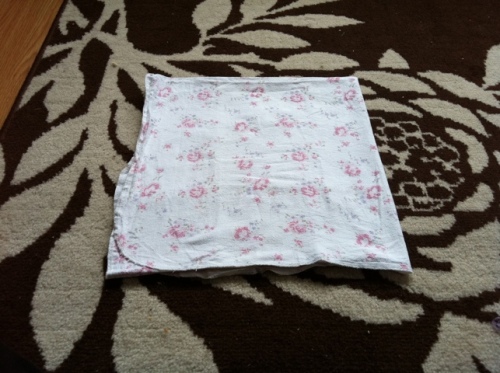
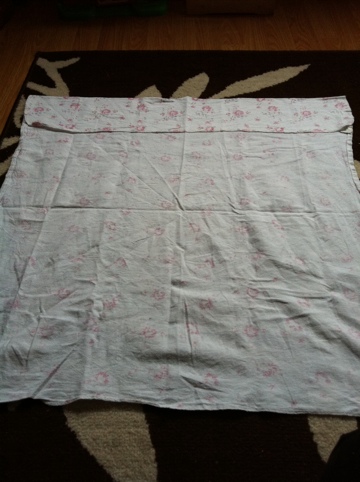
Step one: make a square
If you have real flats they are already square, since I’m using upcycled receiving blankets I need to fold down one side a bit to square off my diaper.

20110527-055604.jpg

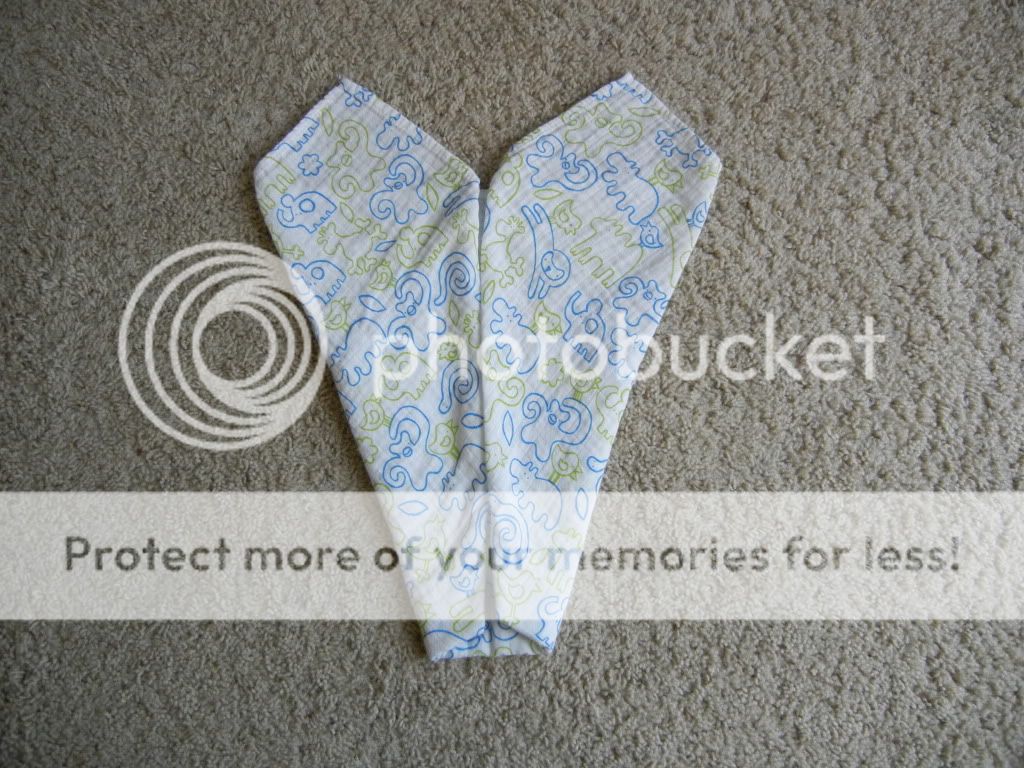
Step Two: fold into quarters

20110527-055814.jpg

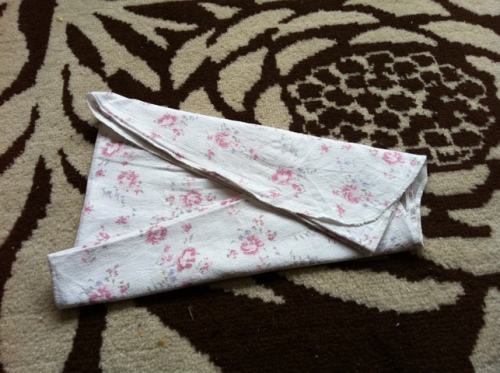
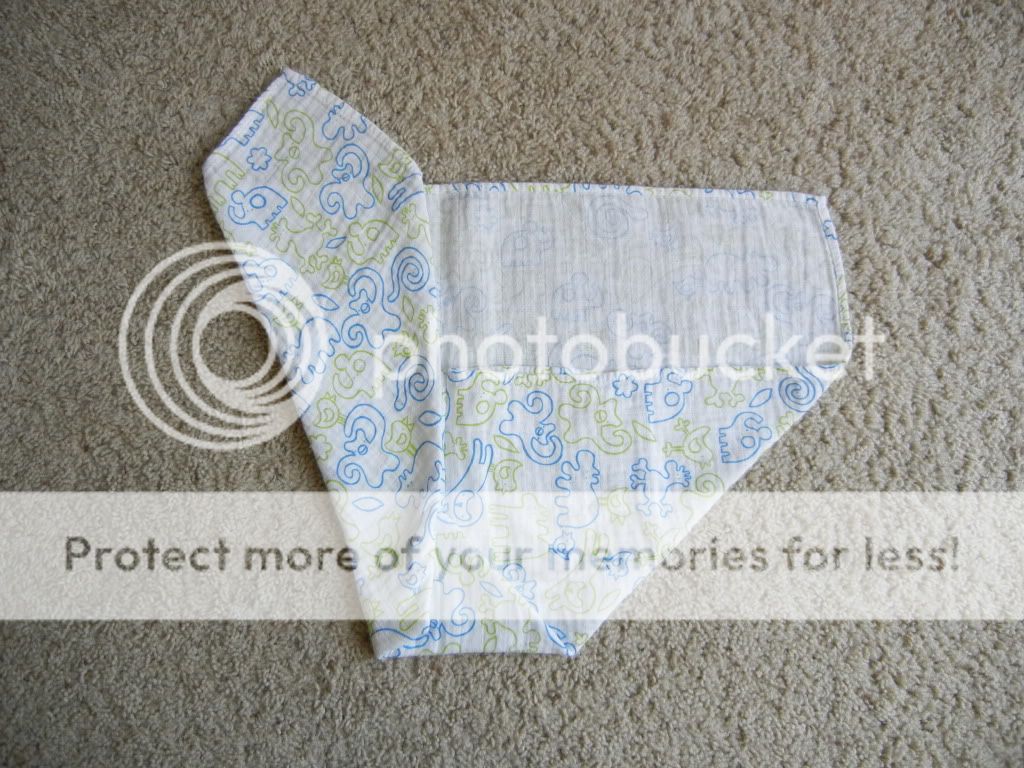
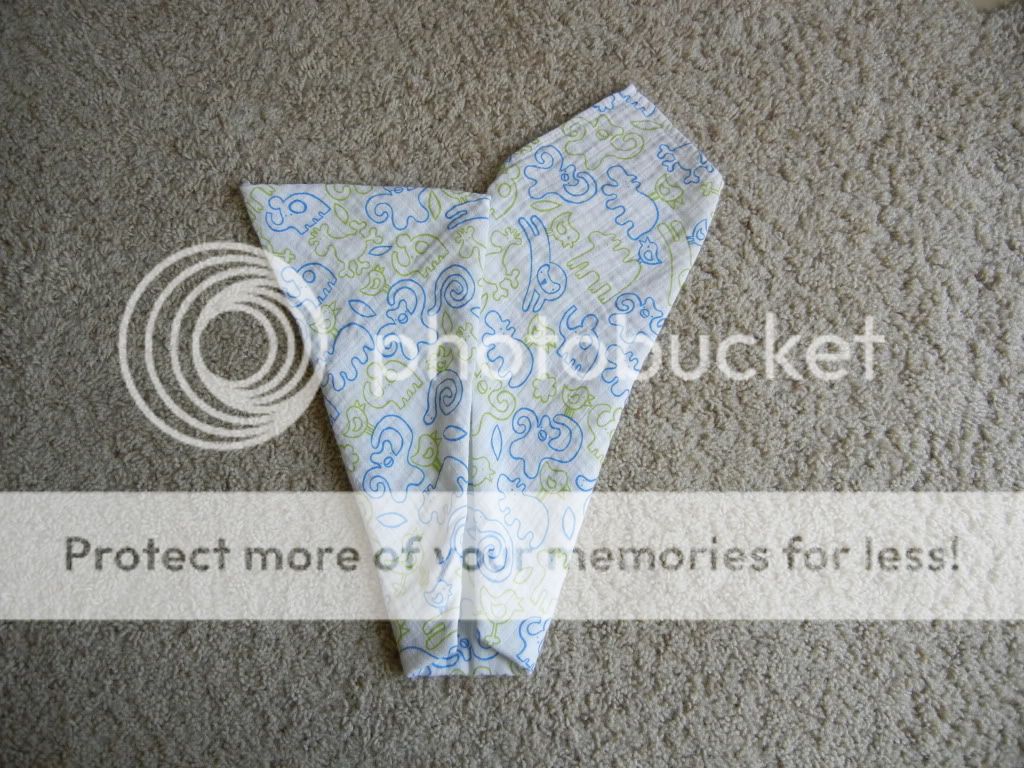
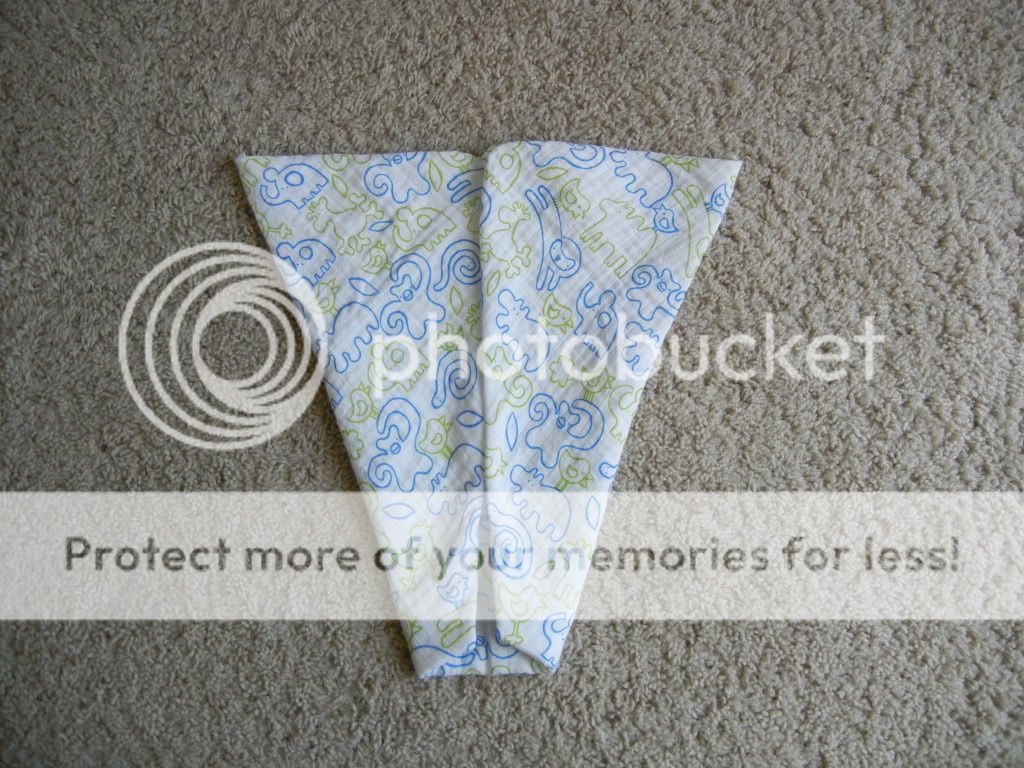
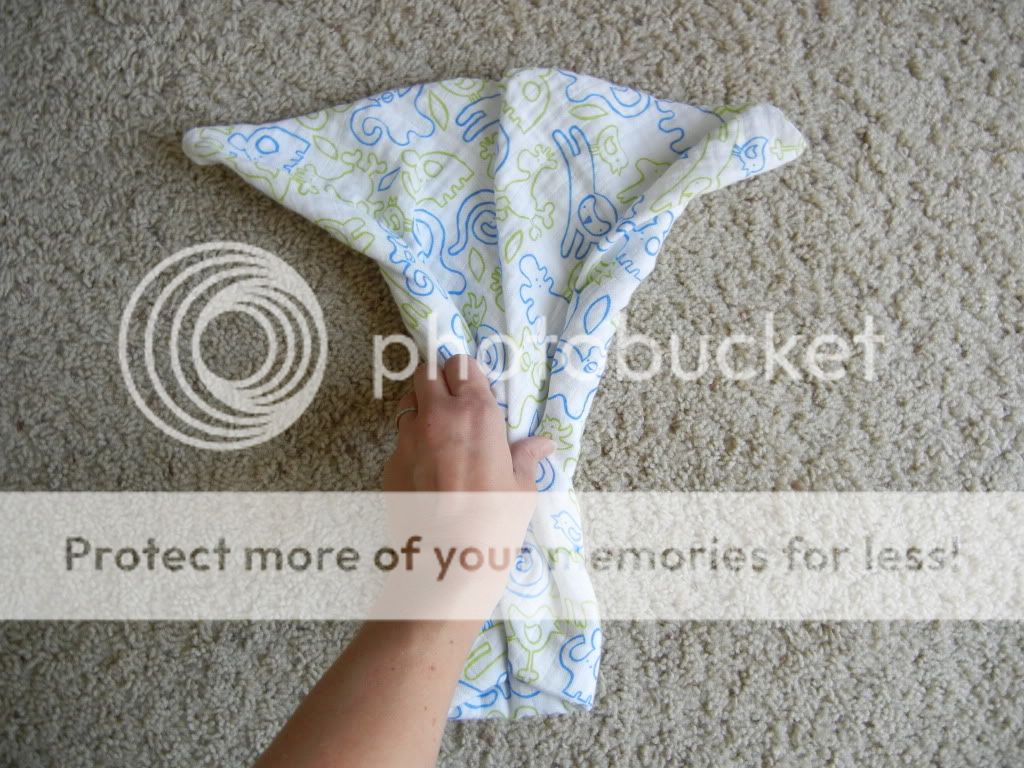
Step three: Fold into soaker
Fold each side at an angle to make a soaker pad that is wider at the back then it is in the front.

20110527-060311.jpg

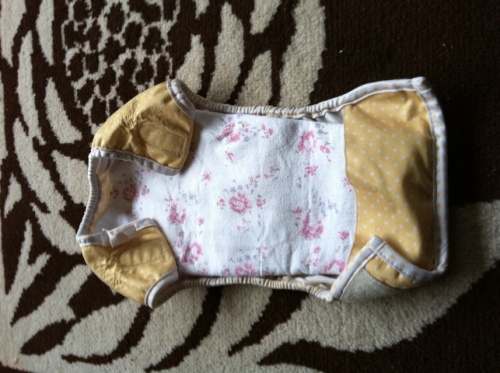
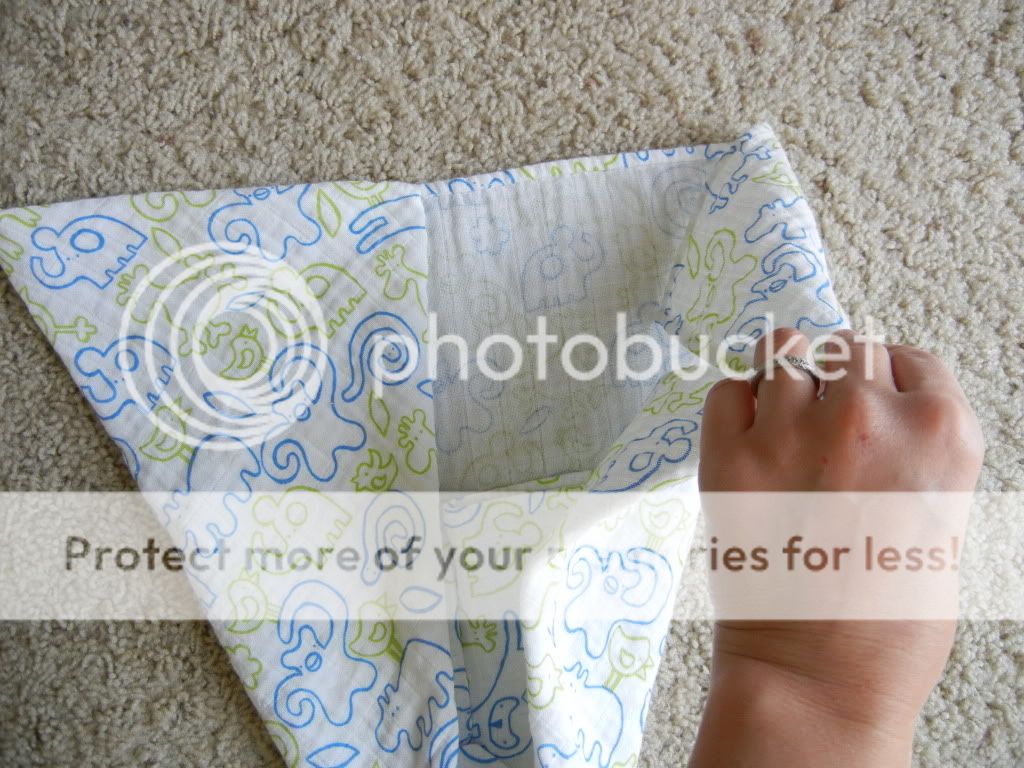
Step 4: place in cover, tuck the narrow end under the flap of the cover (if there is one) ensure the edges are inside the elastic of the cover and pull the back of the cover up to cup around the soaker pad.

20110527-060638.jpg

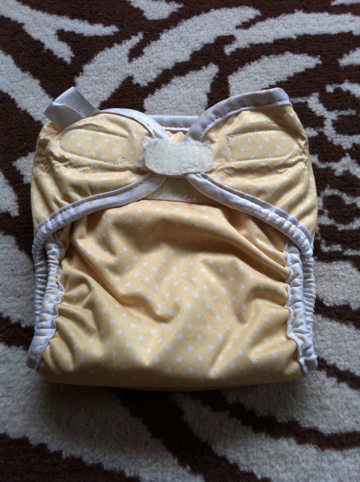
Add a flushable liner if you want and close the diaper cover up to keep it all together. Voila a simple grandma/daddy/babysitter friendly flat fold all in two.”

20110527-060908.jpg

Flat Fold Invention Submission: Shaky Mommy Fold

Here is another submission for the Flat Fold Invention Competition from Brandi at Shaky Mommy. Go ahead and give it a go!

“Okay, so here is my little invented fold. It's a combo of the neat/alternative kite fold and the diaper bag fold, with a little twist of my own.
Start by bringing the top down and the bottom up, as shown.

Then, fold in the sides - I fold each side towards the center, then fold it again, to make it look like this.

Next, create the "poo fence" in the back. (sorry this pic is sideways!)

If you want a liner or extra flat (pad folded) inside, this is when you add it. Make sure you insert it under the poo fence or else the poop will go straight up baby's back!

Now, lay baby on top. Roll each side towards baby to create a sort of wall that will contain the poop. The end product looks like a V.

After you roll each leg, then pull it up between baby's legs and Snappi shut. I can get a very snug leg fit with this fold, which is what helps prevent leaks and saves my covers from the runny poops!

This is the finished product! If you have questions, please let me know and I would be happy to answer them!”

Sunday, May 29, 2011

Flats and Handwashing Challenge–Day 6

[This is a part of the Flats and Handwashing Challenge Series. To read more of my posts on this, see a list here. To see the Dirty Diaper Laundry Flats and Handwashing Challenge series, go here.]

Day 6 was great. I am really getting into the rhythm of things. Yes, kids were in plastic bag covers occasionally today because I am still not back home (and rain came down while I was laying down for a nap with my daughter and soaked my extra cover!). I washed twice and still the only pain with this challenge is the drying. I can’t stand how long it takes to wring stuff out.

But other than that, it is going much better. I am surrounded by family this weekend and everyone keeps saying how much they admire me for sticking to it (and, could you believe, even the most honest people in my family are sitting on one side of my shoulder, coaxing me to cave in because no  one would know!). My mom was sweet, she went to the store and bought me a box of chocolates and said she admired me for how hard I was working on this.

And this made me think about the people who have to do this. I admire those people who have no choice. I assume those people are strapped for time and money and yet they do it anyway. Can I just send you my electronic box of chocolates?

Lessons Learned Today:

* I really think people need a 3 day supply in order to maintain sanity. It is still NOT THAT MUCH MONEY and yet washing doesn’t have to be every day and there is no rush with the drying.

* Plastic bags really do work, in a pinch

* Rockin’ Green works GREAT to wash these. I was amazed by how different the water looked from the first rinse to the last. Like night and day! I like how easily the stuff dissolves. I don’t have to get out clumps of detergent or anything.

Friday, May 27, 2011

Flats and Handwashing Challenge–Day 5

[This is a part of the Flats and Handwashing Challenge Series. To read more of my posts on this, see a list here. To see the Dirty Diaper Laundry Flats and Handwashing Challenge series, go here.]
Is no news good news? I hope so! Today was fairly UN-anti-climactic (that’s right, you get a post without me complaining all the way through it!).
029
Even though I am cloth diapering two babies with a stash that is LESS than recommended for just one, I am actually surviving. I am working off of about 16 flats and 2 covers per baby. I wash in the morning and at night and I am hanging them to dry and they are getting a wonderful breeze. I find that since the water goes downward (duh, gravity), they are damp towards the bottom. So I just like to flip them upside down about halfway through drying. I have NO IDEA if that helps, but I like to think it does!
I did overflow the sink and that was…icky to say the least!
Washing is a CINCH in the laundry sink. So easy. All I have for gadgets are my rubber gloves and detergent. That’s it. It takes only about 8 minutes to wash the diapers and then about 15 to wring them out (ick, my least favorite part about it).
Kids are doing GREAT in the diapers. The youngest (3 month old) was in a padfold all day and it worked great. The oldest was in a diaper bag fold quite a bit, but I was also experimenting with other folds. I am finding that my Rumparooz cover just isn’t working for this challenge. Although it is waterproof, it seems to HOLD water (or pee). The pee leaks right through the diaper on to the outside. It also takes about 30 hours to dry, even in the sun. I love the Thirsties covers and the Flip cover is working very well too.
I did create a database (ok, fine, TABLE) with different folds and instructional videos and I hope you can try some out and give your rating on how the diaper did. I am using stats from the Flat Fold survey to add “scores” to these folds for the table. FUN!
What I learned today
* Turn the flats upside down (so unpin it and take that which is hanging from the bottom and pin that part)
* Don’t overflow the sink
* Be simple: Rubber gloves, detergent, laundry sink (or a tub), drying rack
Happy folding!


Sponsor Spotlight: May

I wanted to highlight my sponsors for this month and give them a special thank you.


Stinkerpants Diapers

Photobucket

I absolutely love the personality of this distributor. She is so kind and excited about diapers (wouldn’t you want to buy from someone like that!). She is offering a great Memorial Day Sale right now:

All BAMBOO basic packs will be buy 3 get the 4th FREE!!!
20% off all other SoftBums AND of all Leslie's Boutique Wetbags!!!
Sale will run from Friday May 27th to Monday May 30th!


Green Diaper Demos

Have you ever bought a diaper and fought leak issues? I often find that little issues I have with diapers could be easily solved with some good advice. I like to buy diapers from places where the person helps me “wear in” to my diaper. If you are wanting to buy a diaper with exceptional troubleshooting, Green Diaper Demos is the place to go. Shipping is free for orders over $40 and she tries to ship stuff out THE SAME DAY. She also offers a Stash Cash Rewards Program to help reward returning customers (there is even an incentive for referrals!).

Oh Katy Diapers

I was sent this diaper to review for the One Size Diaper Project and I personally contacted the owner to ask if she could be a sponsor. I was excited that this diaper held up for me overnight. I stuffed it with my Super Soaker and the diaper was SO soft and had great coverage. I am excited to have this sponsor and I hope you could go check them out.

Thank you SO MUCH, sponsors. I appreciate you so much. Readers, please go and check these out as a special “Thank You” for them keeping Padded Tush Stats going. It takes a lot of work on my part to run all these stats (right now I am working on a HUGE Master table of stats). Having sponsors is the only way I can justify this time to my husband. So please, as a thank you to them for helping me get these stats up, check ‘em out.

If you are interested in becoming a sponsor, I have very low rates right now as I am trying to fill up a few June slots. Please contact me at paddedtushstats@gmail.com to get rates.

Flat Fold Invention Submission: Airplane Fold

Here is another submission to the Flat Fold Invention Contest.  The Airplane Fold:

“I just wanted to share the new fold for flats that I came up with while trying to get flats to work for my DS! I have been trying to master flats in readiness for the flats hand washing challenge that I decided to participate in. I've been trying all the different folds out, but none seemed to fit the criteria that I wanted - a fold that would let me use one flat with no doubler, and minimal bulk in the back and low rise in the front. My DS almost always poops on the potty, so I didn't need any absorbency in the back, but being a boy, needed as much absorbency as I could get in the front. Here is what I came up with. I'm not sure how many layers there are in the front, but there are a lot
So here is how you do it, there is a bit of folding required, but it isn't hard.
IKEA flat, print side down.
Click the image to open in full size.
Fold up the bottom. I usually do about 5 or 6 inches. It might take a few tries to figure out how much you need to fold over here to make it right size for your child.
Click the image to open in full size.
Fold one side up to the center
Click the image to open in full size.
Then fold up the other side
Click the image to open in full size.
Now fold about 1/3 of the bottom of the triangle up.
Click the image to open in full size.
Again, fold the side in towards the center.
Click the image to open in full size.
Then the other side. This creates lots of layers!
Click the image to open in full size.
Fold down the pointy tops between the top and bottom layers.
Click the image to open in full size.
Jelly roll the sides in
Click the image to open in full size.
Pin on baby, or just fold up into a diaper if baby is napping
Click the image to open in full size.
My DS is napping right now, but when he wakes up I'll take a picture of this fold on him. I love that there is almost no bulk in the back, but very absorbent in the front!
If you are using flats, have a toddler boy, give this a try and let me know if it works for you too!
UPDATE:
DS woke up and the diaper didn't leak (granted he wasn't that wet either ) But here are some pictures of him in this fold:
Click the image to open in full size.
I just love how trim it is!

Flat Fold Invention Submission: Accordian Fold

Ashley from Adventures with My Monkeys has submitted a fold tutorial for our Flat Fold Invention Competition. Check it out, this is the accordian fold:

“And now for the new fold I invented today.  I'm sure it's been done before but I've never seen it.  It's similar to a prefold type fold so prefold mamas might really like it.  It's really easy.  I call it accordion fold because you fold back and forth a bit.  This fold would be great for boys.  I think you really need a Snappi for it though-I'll show you why at the end.

Start out with your diaper folded the hot dog way-long and skinny (just fold once)

Now bring one side in towards the middle-you can adjust it later where it needs to go to get the maximum amount of layers in the middle

Fold the edge of that fold back like you did in grade school with a piece of paper when you folded paper accordions

Repeat with other side-bring flap in towards the center

Now fold it back out

At this point you can fold up the rise and put on baby if you want but it will be a bit wide OR...

Fold those edges inside more to make it skinnier and to hold in the breastfed poop

I then put it on Baby K.

Closer picture-note that this is bulkier than normal because he also has a trifolded hemp preflat AND a microfleece liner to stay dry

Here's the issue I mentioned about the Snappi-when you put it on there's an extra little wing you need to secure and I'm not sure that pins will catch it.

Another view of it

It's not perfected yet but I wanted to share.  This was the second time doing this fold.  If you do this fold feel free to comment with your link!  Hopefully this will help some mamas that are having leaking issues with there not being enough layers for boys!”

Flat Fold Invention Submission: Origami Fold with a Twist

Ashley from Adventures with My Monkeys has submitted a fold tutorial for our Flat Fold Invention Competition. Check it out, this is the origami with a twist tutorial.

“This fold is great because it puts a lot of layers along the whole middle.
Baby K and K Bear are all ready to show you how we do our Origami with a Twist :)

Start out as usual-diaper in 4ths (as long as it's about 27"x27")

Make sure the 1 fold is on the left side and the two folded flaps are at the top and the 4 loose flaps are at the bottom and pick up the top layer of the diaper)

Open it up and make a triangle

Fold it smooth.  If your diaper is completely square it will all line up-mine aren't quite square but it's not a huge deal

Flip the WHOLE thing over

This is how it looks with the whole thing flipped

Take the left side and fold the two parts over once

Fold it smooth

Fold it over again

And a third time (you can just do twice but there won't be as many layers)

Now get your baby ready-put it so the point of the whole triangle is towards baby's front

Making sure that the back is lined up high enough in the back, bring the front up and around the baby

At this point you can fold the front over like this to make the rise shorter if you need to

OR before laying the baby on the diaper you can fold the back down like this to help hold breastfed poop in

Fold it smooth

With the rise folded down in front, back, or both fit the diaper around the thigh like this and fold it up.

Another view of the wing folded up around the thigh

Now twist the wing

Bring it around and hold it in the front

Repeat with the other side.  Cross the extra wing in front and bring the wing ends down

Snappi one side

Snappi the other side

Bring the snappi down over the cross to secure it in place.  Alternatively you can pin through all the layers in the center

On the baby-notice how it is really skinny in the hip and there are lots of layers in the hip so the Snappi doesn't scratch him

Another view-he's so stinkin cute :).  By the way-he's wearing an Inspired By Finn teething necklace-I highly recommend them!

Last step-add the cover!  With this fold there is VERY minimal tucking but make sure NO part of the diaper is hanging out of the cover-if it is it will leak.  Make sure the cover fits well around the back, belly, and thighs and secure.

This fold is really trim-even under a onesie.  It's not much bigger than a disposable diaper!

All dressed up in overalls!

Monkey wanted to take pictures with Baby K”
Related Posts Plugin for WordPress, Blogger...